Chapter index
Marker Colouring: advanced techniquesMarker Colouring: advanced techniques
Description
Marker Colouring advanced techniques: a walkthrough on "how to colour with markers". It's a rather long yet in depth tutorial on "how to use markers". Please enjoy!
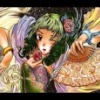
Marker Colouring advanced techniques: a walkthrough on "how to colour with markers" Hello and welcome to my marker tutorial! This tutorial is a step by step guide for those...
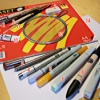
First off I am listing the different materials I used to create the image. 1 - mechanical pencil size 0.5, lead: HB 2 - a normal plastic eraser (soft) and a pencil eraser...
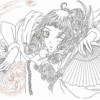
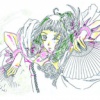
I guess I don't have to tell you how to do the sketch. ;) Anyways, once the pencil sketch was clean and finished I started to draw the outlines with the Copic multiliner black...
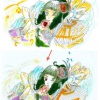
Before you start colouring a marker picture, it's always good to make a rough colour sketch first in order to see if the colours you had in mind really fit together. Quite...
Another thing I love to do before I actually start to colour an image is to mark the spots where shadows should be or particular highlights, keeping the light source(s) in...
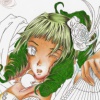
Now comes the fun part, the COLOURING! :D I always start with the skin colour as it is mostly the lightest area on a picture and you won't run into trouble with dark colours...
Again I used the Blender for the coloured reflection of the bracelets and the orb. It's practically the same technique as above with the only difference that the Blender is...
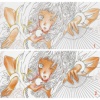
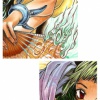
image 1 I applied the second coat of skin colour with E51c to create more defined shadows with the brush nib. image 2 E02 was used to darken the shadow but I only used the...
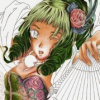
Lastly I added BV31c to the shadows on the skin to give the skin colour more depth. This blue violet picks up the colour from the scarf but cold colours also are a good...
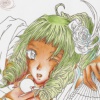
Now comes the second coat of the hair where strands and shadows are modelled with G21. I didn't colour the parts of hair in which another base colour will be added. This is...
The last step on the light hair was to add single strands and to darken shadows even more. For this I used BV31c, BG93c and BV23c (the order is from light to dark). Here the...
The base colour for the darker part of the hair is G07. I coloured it in very carefully so that it looks like the hair gets darker strands. The rest of the hair was coloured...
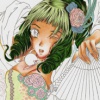
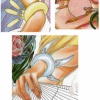
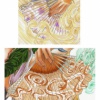
This step is only about the base colours for the dress and the flower in the hair. :) Dress: G40 Pattern & Inlaid Textile: R32 Flower on Dress: RV21 Border Strip:...
Now comes a more difficult part as I had to be quick (wet-in-wet technique) as well as being very precise. So, in order to get a result like this on the dress I used five...

Onto the scarf! :) The little image shows you how I added the three colours "with patterns" of the scarf. I needed to work neat so that the colours didn't overlap. End of the...
Folds were added with the brush nib of BV31c in two layers on top of each other. Because it is supposed to be thin fabric, I put quiet a lot of folds in. I traced the borders...
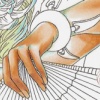
I think I don't need to explain anymore how the Blender is used, right? ;) Again, the Blender is the base for the colours of the bracelets to create a slight fade. Blue...
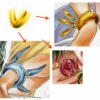
In order to get a metallic feel for the bracelets and a gem touch for the orb, I put two to three layers on the existing one. Blue Bracelet: B32, B45 and I added B00 over...
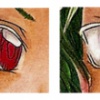
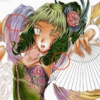
Eyes & Mouth The basic eye colour is R37 whereas the white part of the eye needs some shadow too. Here I used the Blender and W3. On top of that I added BV31c for some defined...
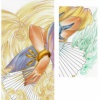
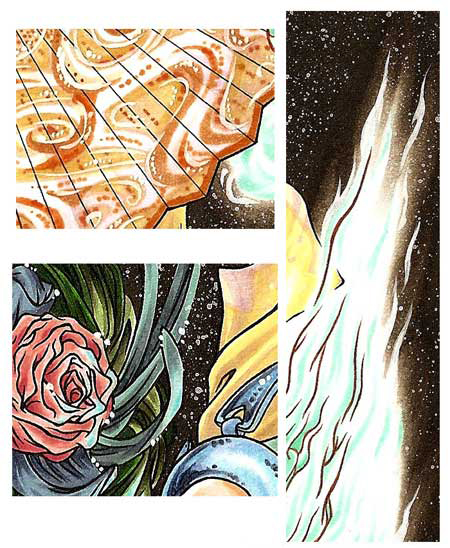
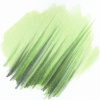
We are now coming towards the last steps of colouring. ^^ Next is the wind. I used E40s for the softer breeze and BG11s for the strong wind and in both cases were the brush...
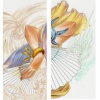
A second layer with the base colour was added to the bluish wind and the darker parts were done with BG34 whereas only Y00c enhances the yellowish touch on the soft wind.
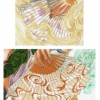
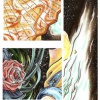
The last things I coloured before I went onto the background were the two fans. I decided that they should reflect the different types of wind which is why I drew a flowery...
More details and depth were added in this step to the fans. The "wood" got some shadows with Cool Gray 7-T and the very thin nib. I used some Warm Gray 2-T (very thin nib) for...
More dark parts... "Wood" on the Fans: Warm Gray 8-T (very thin nib) BV31c (brush nib) Violet Fan: BV31c (for more fade) 264-T (borders of the "paper") Orange Fan:...
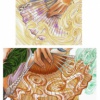
We are finally drawing to a close with the markers. :D Well, since the picture is already very detailed I decided on a simple dark background so that the colours will "glow" a...
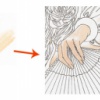
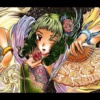
The image in the last step looks a bit strange with those tiny and thin outlines... That's what we are going to change now. This time I added dynamics to the outlines with the...
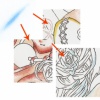
The very last step was to add some sparkling particles or whatever you want to call them. The little images show you what I added with the opaque white. I used the small round...
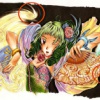
Some rotating, tweaking of the colours (scanners love to eat colours or to display them wrong), adding black bars to give the image some movies kind of feel... ...and VIOLÁ!...
I hope you can find this tutorial useful and it should have given you an insight of how I work with markers. Thanks for reading! Kiwi out!