Painting & Texturing with Watercolors
Description
Let me show you a few techniques to create watercolor paintings with texture and zest.

Today I’m going to show you the watercoloring techniques I used to create my “I Quit"” artwork. You don't need much experience with watercolors to follow this tutorial, as...

When it comes to painting with watercolors a quality-brush is a must! You can generally choose between natural hair brushes or synthetic ones. However, natural sable brushes...
While natural brushes tend to produce better results, there most certainly exist good synthetic brushes that will aid you just as well. But be careful not to buy the kind of...
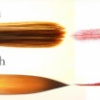
For this tutorial I'm going to use only one brush of the size 8 (a synthetic one). Although it’s quite a big one, it is good enough even for fine details since its point is...
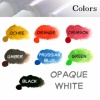
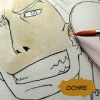
On to the colors! It’s not necessary to have a lot of different colors, in fact it’s much easier to work with a limited palette. For the most part, I will only use these six...
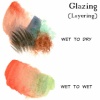
We'll be using these two techniques all the time. Glazing/ Layering is arguably the most important aspect of watercoloring and it makes it quite easy for us to get cool...
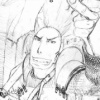
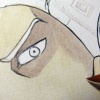
As usual, the first thing to do is sketch out your drawing with pencils. Be light on the pressure in order not to damage the paper, as it can influence the watercolors.
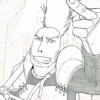
The next step is to ink all the characters, but leave the background without outlines to achieve a visual separation between the characters and their surroundings. However,...
The chains were no doubt the most elaborate part of the inking. If you really want to give it a try, here’s the technique I used. However, don’t forget to follow the shape...
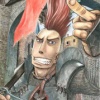
Now we’re finally ready to get to the coloring. In this case, for no special reason, I started with the skin. So, how are we going to create a believable skin texture? The...
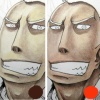
Especially if you are mixing your colors, it's best to paint in all the parts at once. Here I added the ochre skin tones to all characters that I wanted to have...
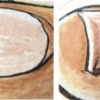
After the first layer has dryed, we can go on to the next. We’ll use umber for the shadows and details in the skin, while we use orange / red to “liven” the skin up. A...
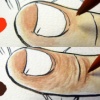
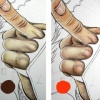
The fingernails can be colored with umbra or red alone. Be careful to leave some highlights and make sure to use straight strokes to accentuate the shape of the fingernails.
All that's left is to add the rest of the shadows and wrinkles with umber. Try not to use real black for the skin, most of the time a deep umber is more than...
Once the umber has dryed, we can add more red and orange to add more life to the skin. Be subtle when you add additional layers. You can always add more, but if you find...
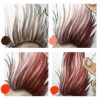
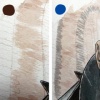
When we’re done with the coloring of the skin, how about moving on to the hair next? For the hair, we’ll have to use more water and long, curvy strokes. It’s best to first...
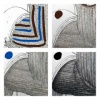
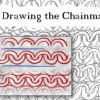
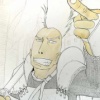
Well, the hair wasn’t too hard. How about something a little more challenging XD ? Yes, we’re going to take on the chainmail next. It would be insane to paint every chain...
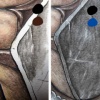
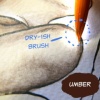
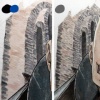
On to something easier: the plates. What I used for it is a bit of black and umber and a very dry brush. With pretty much random strokes it’s easy to get a believable rough...
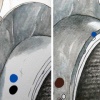
The shoulder plate can be painting with the same technique – adding a bit of blue, black and umber here and there with a dry brush and leaving a few highlights.
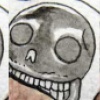
Painting in the black skull is quite simple, since it’s sufficient to only use black. We just have to keep the light source in mind and leave highlights where they belong.
By now we should be pretty much done with the character. It’s time to work on the background! Naturally this is the part that takes the longest, but with the right technique...
The first layer of bricks looks a bit weak at the moment, so we’ll simply add another one with a darker tone. Lastly we’ll paint slight hints of bricks on the rest of the...
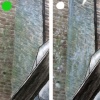
Since we want the brick walls to have a natural, worn-down look, we'll add some special effects to make them look less bland. These castle walls are supposed to be quite...
And this is how the final piece looks like! I hope you were able to learn something useful! Because I sure did (never do chainmail again XD)